Setup Email on iPad (iOS 13)

The Mail App is included in all iPad iOS Versions.

NOTE: This setup is for GCDtec Managed Email Accounts only (however the steps are similar for other providers).

These instructions are based upon the Mail App in iOS 13. Other versions are very similar.

Before you start ensure you have all the details at hand to setup your account (including the password), you may have received these via email & text message. 

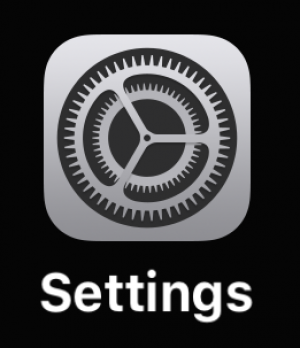
1. Open Settings App.

settings

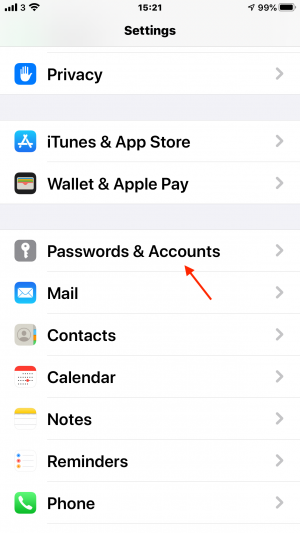
2. Scroll down to Passwords & Accounts

IMG_7473

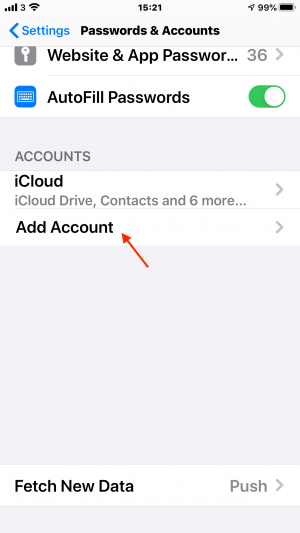
3. Click Add Account

IMG_7474

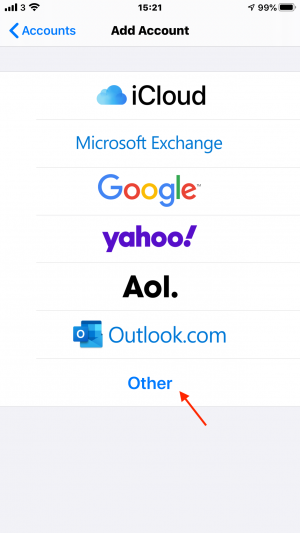
4. Select ‘Other’.

IMG_7475

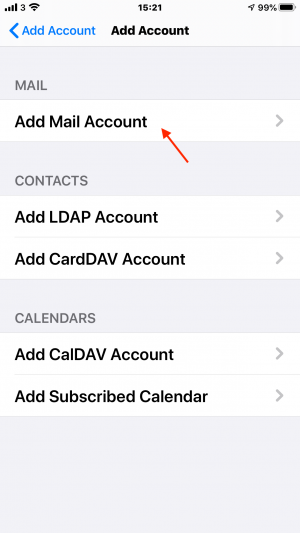
5. Select ‘Add Mail Account’.

IMG_7476

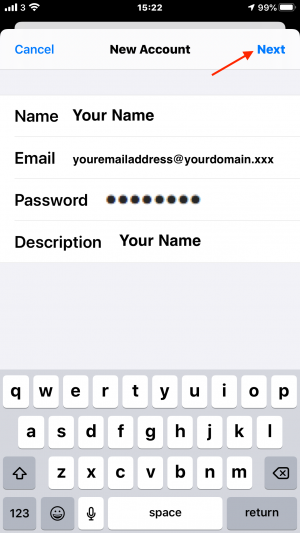
6. Enter your name, your full email address, the password you were given and your name again.

Once done press ‘Next’

NOTE: 

The ‘Name’ Section is what displays on the Outgoing Emails alongside your Email Address.

The ‘Description’ Section is what is displayed in the Mail App for your account.

IMG_7477

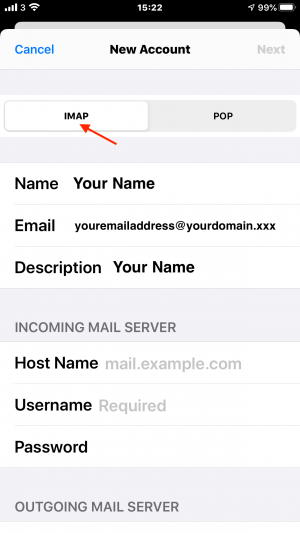
7. Ensure IMAP is selected, then scroll down to show the Incoming and Outgoing Mail Server settings

IMG_7478

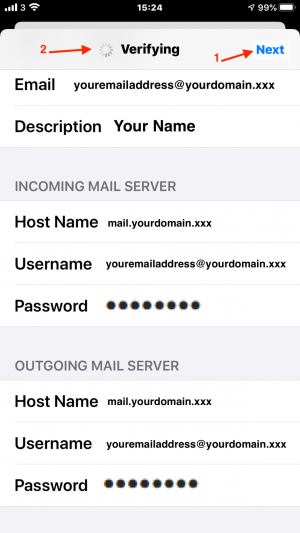
8. Start with ‘Incoming Mail Server’ details, Enter the ‘Host Name’.

You will have been provided the Incoming and Outgoing Server details for the Host Name.

For GCDtec managed email accounts the Host Name is simply your email address with the xxx@ replaced with (mail.)

e.g.

youremailaddress@yourdomain.xxx 

would be:

mail.yourdomain.xxx

(Remember the ‘full stop’ after mail)

Enter the ‘Username’, which is your full email address.

Enter the password you have been provided

You need to do the same for ‘Outgoing Mail Server’ details.

Once done click Next (Step 1) and Verifying should display (Step 2).

Verifying can take 30 seconds to 3 minutes so be patient.

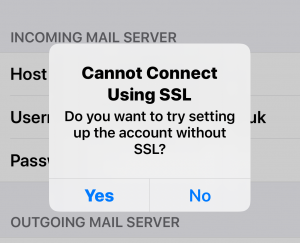
You will be then prompted ‘Cannot Connect Using SSL’, Click YES and wait again 30 seconds to 3 minutes. This prompt will happen again, Click YES.

Quite quickly after the second prompt you should see ‘Blue Ticks’ appear against all the settings you have entered and another screen will appear.

IMG_7480
no ssl1

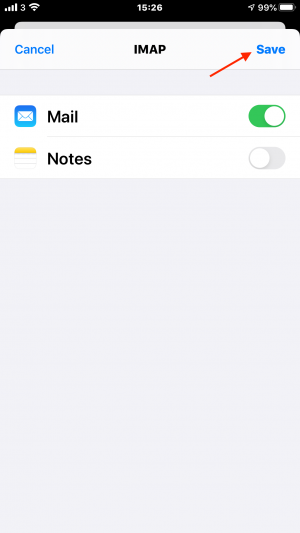
9. Click ‘Save’

You have successfully setup your new email address.

IMG_7483

10. You can access your emails from the Mail App on the Home Screen

Mail App